E-Bike
Mastering Electric Bike Repair: Expert Tips and Tricks
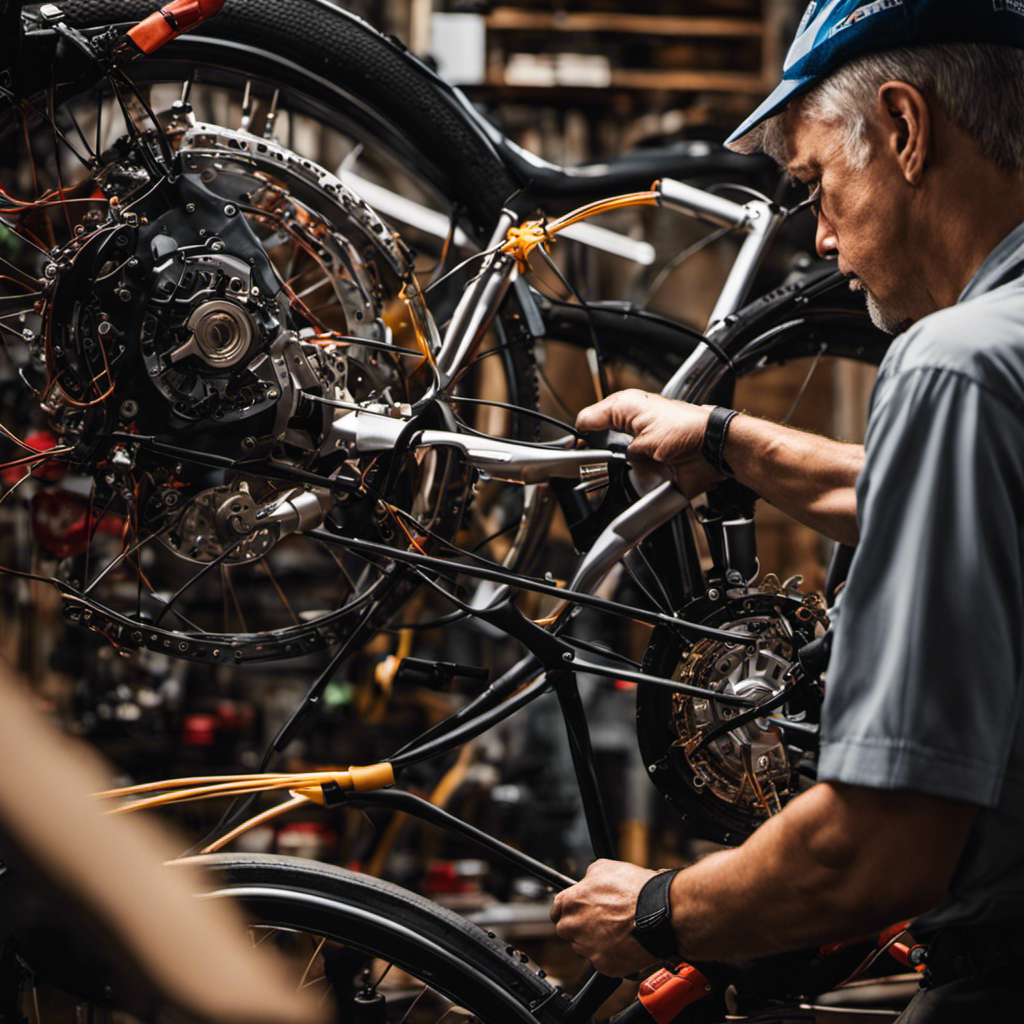
I’ve always been captivated by how electric bicycles function. Their ability to smoothly cruise down the roads, propelled by a blend of human effort and advanced technology, is genuinely astounding.
But what happens when something goes wrong? That’s where my expertise comes in. In this article, I’ll share my secrets for mastering electric bike repair.
From diagnosing common issues to replacing damaged gears, I’ve got you covered. So grab your tools and get ready to become your own electric bike mechanic. Trust me, it’s a skill worth knowing.
Key Takeaways
- Electric bike repair can be done by anyone, regardless of their experience or skill level.
- Proper preparation and gathering the necessary tools and materials is crucial before starting a repair job.
- Specific components that may require repair include handlebars and seat posts, chains, gears, tires and tubes, and the motor.
- Regular maintenance and proper repair techniques are important to prevent issues and keep the electric bike running smoothly.
Identifying and Diagnosing Common Issues
First, I identify the issue by examining the symptoms and diagnosing any faults that may be present in order to determine the source of the problem.

When troubleshooting battery problems, I carefully inspect the battery connections, checking for loose or corroded terminals. I also use a voltage meter to test the battery’s charge and ensure it is within the recommended range.
If the battery is functioning properly, I move on to fixing the electric bike display and controls. I check for any loose or damaged wiring connections and use a soldering iron to fix any faulty connections. I also ensure that the display and controls are properly calibrated and programmed.
Essential Tools and Materials for Electric Bike Repair
Before I begin any electric bike repair, I make sure to gather all the necessary tools and materials. Choosing the right tools for electric bike repair is crucial to ensure a successful repair job.
I always have a variety of tools on hand, including wrenches, screwdrivers, Allen keys, a soldering iron, voltage meter, wire cutters, and pliers. It’s also important to have spare parts, grease, electrical tape, and safety equipment like gloves, a helmet, and safety glasses.
Properly maintaining electric bike components is essential for their longevity and performance. Regularly checking and tightening handlebars and seat posts using the appropriate tools is important. Additionally, replacing a broken chain, damaged gears, and worn-out tires and tubes should be done with precision and care.
Tightening Handlebars and Seat Posts
When tightening handlebars and seat posts on my electric bike, I always make sure to use the appropriate tools for the job.
For adjusting handlebar height, I use a hex wrench or screwdriver depending on the type of installation clamp, whether it’s a Quick Release (QR) or Threadless Stem. It’s important to follow the manufacturer’s instructions for tensioning recommendations to ensure a secure and comfortable fit.
As for lubricating the seat post, I use an allen key or flathead screwdriver to loosen the seat post clamp, apply a small amount of grease to the post, and then re-tighten the clamp. This helps prevent rust and ensures smooth adjustment when raising or lowering the seat.
Taking these steps ensures that my handlebars and seat posts are secure and functioning properly on my electric bike.
Replacing a Broken Chain
To replace a broken chain on my electric bike, I start by removing any rust from the sprockets before threading the new chain into the corresponding link on the rear sprocket.
It’s important to ensure that the chain is properly installed for smooth and efficient riding. After removing the old chain, I carefully clean the sprockets to eliminate any debris or dirt that may affect the performance of the new chain.
Then, I thread the new chain into the corresponding link on the rear sprocket, making sure to leave about 1/4 inch of slack for a snug fit. Finally, I link each sprocket together, ensuring that they are securely connected.
Proper chain tensioning is crucial to prevent chain slippage and ensure optimal power transfer. By following these steps and paying attention to detail, I can confidently install a new chain on my electric bike.
Replacing Damaged Gears
Replacing damaged gears on my electric bike involves several steps to ensure a successful repair. Here are three important steps to consider:
-
Careful Inspection: Before installing new gears, thoroughly inspect all the components. Look for signs of wear or tear, misalignment, or any other issues that may have caused the gear damage.
-
Cleaning and Preparation: Use appropriate cleaning products and brushes to remove any dirt or debris from the gear system. This step is essential to ensure smooth operation and prevent any contaminants from causing future damage.
-
Proper Installation: When installing the new gears, make sure they are aligned correctly and securely fastened. Avoid over-tightening to prevent unnecessary strain on the gears. Double-check for any loose parts before spinning the wheels to ensure everything is in place.
Replacing Tires and Tubes
I always ensure that I choose the right size tire for my electric bike’s wheel rim when replacing tires and tubes. Choosing the correct tire and tube is crucial for optimal performance and safety.
To do this, I first measure the diameter and width of my wheel rim. Then, I match these measurements with the corresponding tire size. It’s important to select a tire that fits snugly on the rim without any gaps or overhang.
Once I have the right tire, I also pay close attention to proper inflation techniques. I use a reliable air pump or compressor to inflate the tire to the recommended pressure rating, which is usually indicated on the tire sidewall. This ensures that the tire is neither under-inflated, which can lead to poor handling and increased rolling resistance, nor over-inflated, which can cause a harsh ride and potential damage to the tire.
Replacing the Motor
When replacing the motor on my electric bike, I carefully choose a compatible motor that ensures secure connections and proper mounting for optimal performance. Motor compatibility is crucial for a smooth and efficient ride. Troubleshooting techniques are essential to identify and solve any motor issues that may arise.
Here are three important points to consider when replacing the motor:
-
Consult the manual or seek professional advice: Before replacing the motor, it is important to understand the specific requirements and recommendations for your electric bike model. The manual or professional advice can provide valuable insights into troubleshooting techniques and motor compatibility.
-
Take your time and be patient during the installation process: Installing a motor requires precision and attention to detail. Take your time to ensure that all connections are secure and properly mounted. Rushing the installation process can lead to performance issues and potential damage.
-
Test and monitor performance: After replacing the motor, it is essential to test and monitor its performance. Pay attention to any unusual sounds, vibrations, or decreased efficiency. Troubleshooting techniques such as voltage meter readings and visual inspections can help identify and resolve any issues that may arise.
Troubleshooting Battery Problems
To troubleshoot battery problems, it is important to carefully inspect the connections and voltage levels for optimal performance.
Start by checking the battery connections to ensure they are secure and free from corrosion. If there are any loose or corroded connections, tighten them or clean them with a wire brush and baking soda solution.
Next, use a voltage meter to measure the voltage levels of the battery. A fully charged battery should have a voltage reading within the manufacturer’s recommended range. If the voltage is low, try charging the battery with a different charger to eliminate the possibility of a faulty charger.
Additionally, to extend battery life, avoid overcharging or fully depleting the battery and store it in a cool, dry place when not in use.
Regularly maintaining and caring for the battery will help ensure optimal performance and longevity.
Repairing Electric Brake Systems
Repairing electric brake systems requires proper inspection of the brake pads, calipers, and cables to ensure optimal performance and safety. As a knowledgeable technician, I understand the importance of troubleshooting brake malfunctions and addressing common brake system problems promptly. Here are three key areas to focus on when repairing electric brake systems:
-
Brake Pads: Inspect the brake pads for excessive wear or damage. Replace any pads that are worn down to the minimum thickness. Ensure proper alignment and contact with the rotor for effective braking.
-
Calipers: Check the calipers for any signs of leakage or malfunction. Clean and lubricate the caliper slides to ensure smooth operation. Verify that the calipers are properly aligned and gripping the rotor evenly.
-
Cables: Examine the brake cables for any fraying, kinks, or tightness. Replace any damaged cables and adjust the tension as needed. Ensure that the cables are properly routed and securely fastened to prevent any interference with braking.
Fixing Electric Bike Display and Controls
I can easily fix the electric bike display and controls by checking for loose connections and ensuring proper alignment of the components.
When it comes to repairing display malfunctions, it’s important to be meticulous and detail-oriented. The first step is to troubleshoot control system errors.
I start by examining the display for any loose wires or connectors. If I find any, I carefully reconnect them, making sure they are secure.
Next, I check the alignment of the display and controls to ensure they are properly seated. If the display still malfunctions, I refer to the manufacturer’s manual for troubleshooting tips.
It’s important to be patient and methodical during this process. By following these steps, I can successfully repair any display and control issues on an electric bike.
Solving Electric Bike Charging Issues
When troubleshooting electric bike charging issues, it’s important to check the battery connections and ensure they are securely fastened. Loose connections can lead to inefficient charging and potentially dangerous situations.
Here are some safety precautions and common charging mistakes to be aware of:
-
Safety Precautions:
- Always wear safety glasses and gloves when handling batteries and charging equipment.
- Keep the charging area clean and free from clutter to prevent accidents.
- Use a charger specifically designed for your electric bike to avoid overcharging or damaging the battery.
-
Common Charging Mistakes:
- Plugging the charger into an outlet with a different voltage than the recommended one.
- Charging the battery for too long, which can lead to overcharging and reduced battery life.
- Using a damaged or incompatible charger, which can cause electrical issues or damage the battery.
Maintaining and Cleaning Electric Bike Components
To maintain and clean electric bike components, it’s essential to regularly remove dirt and debris using appropriate cleaning products and brushes. Cleaning and lubricating electrical connections is crucial for ensuring optimal performance and longevity of your electric bike.
Start by unplugging the battery and removing any dirt or grime from the connections using a soft brush or cloth. Inspect the connections for any signs of corrosion or damage, and if necessary, clean them with a mixture of baking soda and water. After cleaning, dry the connections thoroughly before reconnecting the battery.
Additionally, maintaining battery efficiency is essential for maximizing the range and lifespan of your electric bike. Keep the battery charged between 20-80% and avoid exposing it to extreme temperatures. Regularly check the battery’s voltage and use a compatible charger to ensure proper charging.
Advanced Tips for Electric Bike Repair
One important aspect of advanced electric bike repair is familiarizing yourself with the specific components and their functions. It is crucial to understand how each part works in order to troubleshoot and fix any issues that may arise.
Here are three key areas to focus on when dealing with advanced repairs:
-
Troubleshooting Battery Problems: The battery is the heart of an electric bike, so it’s essential to know how to diagnose and fix battery-related issues. This includes checking for loose connections, testing the voltage output, and ensuring proper charging.
-
Fixing Electric Bike Display and Controls: The display and controls on an electric bike allow riders to adjust settings and monitor performance. Understanding how these components work will enable you to troubleshoot display malfunctions, button failures, or connectivity issues.
-
Mastering Advanced Wiring and Circuitry: As electric bikes become more sophisticated, understanding wiring and circuitry becomes increasingly important. This involves being able to trace electrical connections, identify faulty wires, and repair or replace them as needed.
Frequently Asked Questions
How Can I Troubleshoot Battery Problems With My Electric Bike?
To troubleshoot battery problems with your electric bike, start by checking the battery connections for any loose or corroded wires.
Make sure the battery is fully charged and that the charger is functioning properly.
If the battery still doesn’t work, it may be time to replace it.
Regular electric bike battery maintenance, such as keeping it clean and storing it properly, can help prevent issues.
If you’re unsure, it’s always best to consult a professional for troubleshooting electric bike battery issues.
What Are Some Common Issues With Electric Brake Systems and How Can I Fix Them?
Common issues with electric brake systems include brake squeaking, reduced braking power, and brake drag.
To fix these problems, I recommend starting with regular maintenance, such as cleaning and lubricating the brake components. If the issue persists, it may require adjusting the brake pads or replacing them if they are worn.
Troubleshooting battery drainage is also important, as a low battery can affect the performance of the electric brake system. Regularly check the battery connections and ensure they are secure to prevent any issues.
How Do I Fix Problems With the Electric Bike Display and Controls?
To fix problems with the electric bike display and controls, start by troubleshooting motor issues. Check the connections and wiring to ensure everything is secure.
If the display is not working, check the power source and replace the battery if necessary.
For lighting problems, check the wiring and connections, and replace any faulty bulbs or LEDs.
It’s important to be meticulous and detail-oriented when addressing these issues to ensure a proper fix.
What Are Some Common Charging Issues With Electric Bikes and How Can I Solve Them?
When it comes to electric bike charging, troubleshooting and maintenance are essential.
Common charging issues can include a faulty charger, a damaged battery, or an issue with the charging port.
To solve these problems, first, check the charger and ensure it is functioning correctly.
If the charger is fine, inspect the battery and charging port for any damage. If necessary, replace the faulty components.
Regular maintenance, such as keeping the battery clean and properly connected, can help prevent charging issues in the future.
What Are Some Advanced Tips for Electric Bike Repair?
Advanced diagnostics and upgrading components are essential for mastering electric bike repair. By honing these skills, I’ve been able to take my repairs to the next level.
When it comes to diagnostics, it’s important to have a deep understanding of the various systems and components of an electric bike. This allows me to accurately identify and fix complex issues.
Additionally, upgrading components can greatly enhance the performance and efficiency of an e-bike, providing riders with an even better riding experience.
Conclusion
After mastering the expert tips and tricks of electric bike repair, I’m now confident in my ability to diagnose and fix common issues.
With a simple set of tools and materials, I can tighten handlebars, replace a broken chain, and fix damaged gears.
I can even troubleshoot display and charging issues.
Regular maintenance and cleaning will ensure my electric bike continues to run smoothly.
My meticulous attention to detail guarantees that I can handle advanced repairs with ease.
So, join me on this thrilling journey of mastering electric bike repair!

I am Charlotte, an author of ManagEnergy.tv and I love everything about energy management! I have always been passionate about helping people and businesses save energy and money, so this is the perfect career for me!

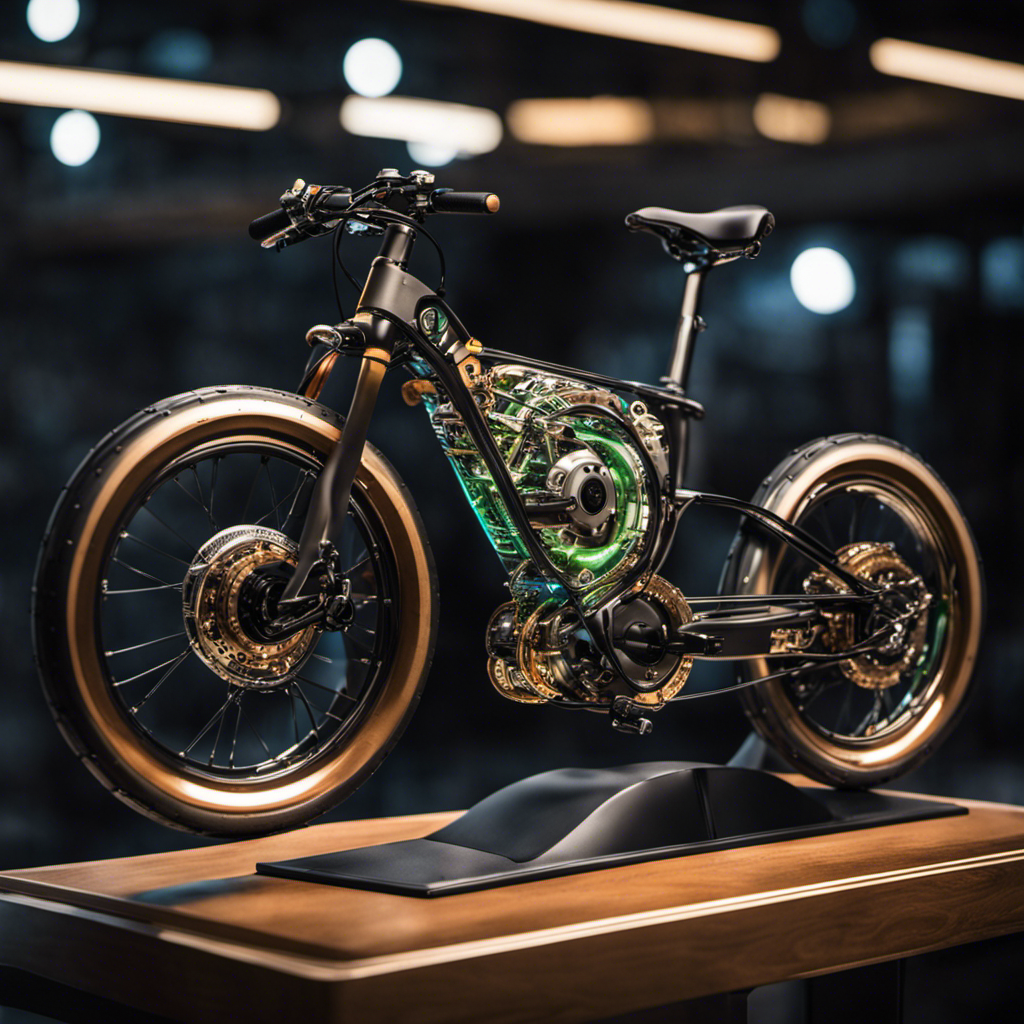
Pedaling through the lively streets of the city, I’m enveloped by a thrilling atmosphere. Today marks the day I reveal the mechanics behind electric bike motors, shedding light on the secrets of their sustainable energy.
Join me on this journey as we dive into the types of motors, explore their intricate components, and uncover the key to maximizing performance.
With each turn of the pedal, we’ll uncover the advantages, the challenges, and the untapped potential of these remarkable machines.
Get ready to revolutionize your commute and embrace a greener future.
Key Takeaways
- Electric bike motors consist of hub motors and mid-drive motors, with hub motors being less expensive and easier to install, while mid-drive motors offer more power.
- The components of an electric bike motor include the drivetrain design, motor torque, and control systems, which work together to ensure optimal performance.
- Different types of batteries can be used for electric bike motors, such as Li-ion, lead-acid, NiMH, or LiFePO4 cells, each with their own advantages and disadvantages.
- Controllers play a vital role in the functioning of electric bike motors, with DC brushless controllers, programmable controllers, and torque sensor systems being important for optimal motor power output.
Understanding the Types of Electric Bike Motors
I’ve learned that electric bike motors come in two main types: hub motors and mid-drive motors.
Hub motors are located in the wheel hubs and connected directly to the wheel, while mid-drive motors are mounted near the crankset and can be activated through pedaling or throttle control.
Hub motors have several advantages, such as being less expensive and easier to install. They provide a smooth and quiet ride, as the weight of the motor is evenly distributed.
On the other hand, mid-drive motors have their own set of disadvantages. They tend to be more expensive and require more maintenance due to their complex design. Additionally, mid-drive motors can put more strain on the drivetrain, resulting in increased wear and tear.
Despite these drawbacks, mid-drive motors offer higher torque levels, making them ideal for tackling steep inclines and providing better overall performance.
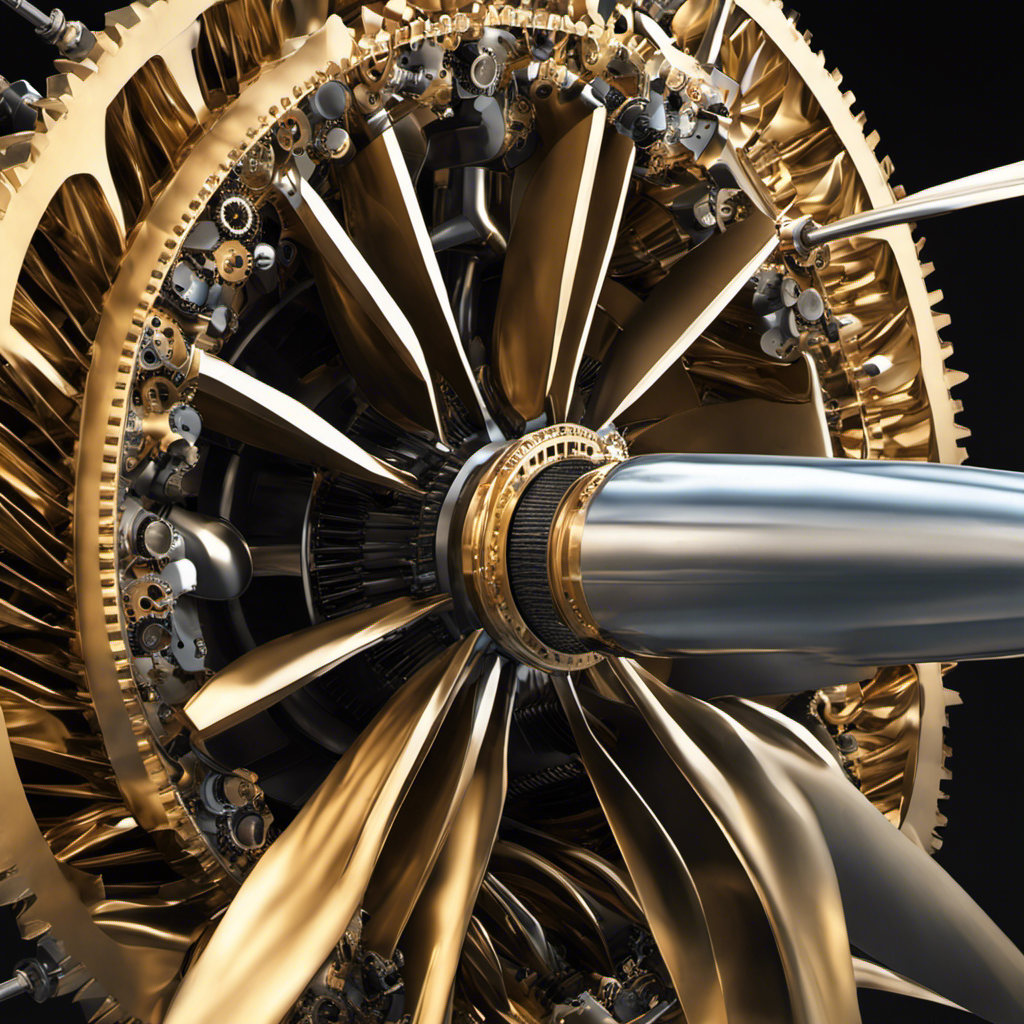
Exploring the Components of Electric Bike Motors
Understanding the role of each component ensures optimal performance of the electric bike motor. The components of an electric bike motor are crucial in determining its efficiency and power output. Let’s explore these components in detail:
-
Drivetrain design: The drivetrain design of an electric bike motor maximizes efficiency when pedaling, ensuring a smooth and effortless riding experience.
-
Motor torque: Motor torque provides extra power assistance when needed, allowing riders to conquer steep hills and challenging terrains with ease.
-
Control systems: Control systems monitor important performance metrics such as speed and battery level, ensuring efficient and safe operation of the motor.
-
Batteries: Different types of batteries, such as Li-ion or lead-acid, can be used to power the motor. Choosing the right battery is crucial for optimal performance and range.
-
Controllers: Controllers play a vital role in regulating motor speed and power output based on user input. They enable customization and allow for efficient energy use.
Exploring the impact of electric bike motors on urban transportation and examining their future potential in professional cycling competitions showcases the versatility and potential of these eco-friendly transportation solutions.
Choosing the Right Battery for Your Electric Bike Motor
When selecting a battery for my electric bike motor, it’s important to consider factors such as capacity, cost, and charging efficiency. The battery performance plays a crucial role in determining the overall performance of the electric bike. Different types of batteries, such as Li-ion, lead-acid, NiMH, or LiFePO4 cells, can be used. Li-ion batteries have higher capacities but cost more, while lead-acid batteries offer good value for money but may have less efficient charging protocols. Regular maintenance is important for optimal battery performance. The table below provides a comparison of the different battery types:
| Battery Type | Capacity | Cost | Charging Efficiency |
|---|---|---|---|
| Li-ion | High | High | High |
| Lead-acid | Moderate | Low | Low |
| NiMH | Moderate | High | Moderate |
| LiFePO4 | High | High | High |
Considering these factors will ensure that the chosen battery meets the requirements of my electric bike motor, providing reliable and efficient power for my eco-friendly commute.
The Role of Controllers in Electric Bike Motors
Controllers play a crucial role in regulating the speed and power output of electric bike motors. They are the brains behind the operation, ensuring that the motor functions optimally and efficiently.
Here are some key points about the impact of controller technology on electric bike motor performance:
- Controller technology directly affects the responsiveness and smoothness of the motor’s power delivery.
- Advanced controllers can provide more precise control over motor speed and torque, resulting in a better riding experience.
- The right controller can maximize the efficiency of the motor, extending the range of the electric bike.
- Regenerative braking systems, enabled by controllers, can capture and store energy during braking, further enhancing efficiency.
- The future of controller advancements in electric bike motors looks promising, with developments in sensor technology and intelligent algorithms to optimize motor performance.
With continued advancements in controller technology, we can expect electric bike motors to become even more efficient, powerful, and responsive in the future.
Advantages of Electric Bike Motors for Your Commute
As a commuter, I appreciate the convenience and time-saving benefits of electric bike motors. Not only do they make my daily commute easier and faster, but they also have numerous advantages for my health and wellness. Electric bike motors provide assistance when pedaling, making it easier to tackle hills and long distances. This helps improve cardiovascular health and overall fitness levels. Additionally, electric bikes are a great option for those who want to reduce their environmental impact. Electric bike motors produce fewer emissions compared to traditional combustion engines, contributing to cleaner air and a healthier environment. With their ability to combine exercise and sustainability, electric bike motors are truly a game-changer for commuters like me.
| Advantages of Electric Bike Motors for Health and Wellness | Environmental Impact of Electric Bike Motors |
|---|---|
| Improved cardiovascular health | Reduced emissions |
| Increased fitness levels | Cleaner air |
| Easier tackling of hills and long distances | Sustainable transportation |
Disadvantages of Electric Bike Motors to Consider
Although there are many advantages to using electric bike motors, it’s important to consider the potential disadvantages as well.
-
Cost effectiveness: Electric bike motors can be costly to repair and maintain due to specialized parts and services, which may impact the overall cost effectiveness of owning an electric bike.
-
Environmental impact: While electric bike motors produce emissions that have an environmental impact, it is important to note that their impact is significantly less than that of combustible engines.
-
Maintenance requirements: Electric bike motors require more frequent maintenance due to their complexity, which can be time-consuming and potentially costly for the owner.
-
Limited range: Electric bike motors have a limited range, depending on the battery capacity, which can be a disadvantage for those who need to travel long distances.
-
Charging infrastructure: The availability of charging infrastructure for electric bike motors can be limited, which may restrict their usability in certain areas.
Considering these potential disadvantages alongside the advantages is crucial in making an informed decision about using electric bike motors.
The Inner Workings of Hub Motors
When using a hub motor, I can feel the direct power transfer from the motor to the wheel. Hub motors are located in the wheel hubs, providing a compact and efficient design. They offer several advantages over other types of electric bike motors. Firstly, hub motors are less expensive and easier to install. They also require less maintenance compared to mid-drive motors. Additionally, hub motors provide a smooth and quiet ride due to their direct power transfer. However, there are some maintenance tips to keep in mind. Regularly checking the motor’s wiring and connections is important to ensure optimal performance. Additionally, keeping the motor clean and free from debris will help prevent any issues. Overall, hub motors are a reliable and efficient choice for electric bike motors.
| Advantages of Hub Motors | Maintenance Tips for Hub Motors |
|---|---|
| Less expensive and easier to install | Regularly check wiring and connections |
| Requires less maintenance compared to mid-drive motors | Keep motor clean and free from debris |
| Provides a smooth and quiet ride |
Unveiling the Mechanics of Mid-Drive Motors
I can feel the increased power and torque of mid-drive motors, which are mounted near the crankset and provide optimal performance through pedaling or throttle control.
Mid-drive motors offer superior efficiency compared to hub motors. They provide better hill climbing capabilities, making off-road biking more accessible and enjoyable. The weight distribution is improved with mid-drive motors, resulting in better balance and maneuverability. Mid-drive motors allow for a wider range of gear ratios, enabling cyclists to tackle various terrains. The ability to utilize the bike’s existing gears enhances efficiency and control.
When it comes to off-road biking, mid-drive motors have numerous benefits. Their efficiency surpasses that of hub motors, ensuring a seamless and powerful riding experience. The increased torque levels of mid-drive motors make conquering steep hills and challenging terrain a breeze.
With better weight distribution and the ability to utilize existing gears, cyclists can maintain balance and maneuverability in any situation. The wider range of gear ratios provided by mid-drive motors allows for versatile riding on different terrains. Whether it’s climbing steep inclines or navigating through rough trails, mid-drive motors deliver the power and performance needed for an exhilarating off-road biking adventure.
Maximizing Efficiency With the Right Drivetrain Design
To maximize efficiency, choosing the right drivetrain design is crucial. Design considerations play a significant role in optimizing power output for electric bike motors. The drivetrain design determines how power is transferred from the motor to the wheels, impacting the overall performance of the bike.
Factors such as gear ratios, chain tension, and overall weight distribution must be carefully considered. A well-designed drivetrain ensures efficient power transfer, minimizing energy loss and maximizing the motor’s output. By optimizing power output, the electric bike can achieve higher speeds and better acceleration while using less energy.
Additionally, a properly designed drivetrain can enhance the overall riding experience, providing smooth and responsive power delivery. Therefore, selecting the right drivetrain design is essential for maximizing efficiency and optimizing power output in electric bike motors.
Harnessing Extra Power With Motor Torque
By harnessing motor torque, I can experience enhanced power assistance when riding my electric bike. This allows me to achieve higher speeds and quicker acceleration, making my commute more efficient and enjoyable.
Here are some key factors to consider when harnessing motor torque:
-
Enhancing speed and acceleration with mid-drive motors: Mid-drive motors are preferred for their ability to provide higher torque levels, resulting in improved speed and acceleration compared to hub motors.
-
Achieving optimal power output with the right controller: The controller plays a crucial role in regulating the motor’s speed and power. Choosing the right controller ensures that the motor operates at its maximum potential, providing optimal power output for a smoother and more efficient ride.
-
Properly adjusting the torque sensor: The torque sensor allows me to adjust the power output based on the road conditions. By correctly calibrating the torque sensor, I can ensure that the motor provides the right amount of assistance when needed, enhancing my overall riding experience.
-
Regular maintenance: To maintain optimal motor torque, regular maintenance is essential. This includes keeping the motor clean, checking for any loose connections, and ensuring that the motor’s components are in good working condition.
-
Battery capacity: The battery’s capacity directly affects the motor’s torque. A higher capacity battery can provide more power to the motor, resulting in increased torque and better performance.
Monitoring Performance With Control Systems
Monitoring performance with control systems allows me to track important metrics such as speed and battery level, ensuring optimal functionality of my electric bike motor.
Implementing smart technology in electric bike motor control systems has revolutionized the way we ride. These advanced control systems not only provide real-time data on speed and battery level but also offer features like regenerative braking and customizable acceleration levels for energy efficiency.
The future of electric bike motors holds exciting advancements and innovations. With the integration of artificial intelligence and machine learning, control systems will become even smarter, adapting to individual riding styles and optimizing power output based on road conditions.
Additionally, advancements in battery technology will lead to longer ranges and faster charging times. By constantly monitoring and improving control systems, we can ensure that electric bike motors continue to deliver sustainable and efficient transportation options for years to come.
Comparing Different Battery Types for Electric Bike Motors
Using different types of batteries, such as Li-ion, lead-acid, NiMH, or LiFePO4 cells, allows me to choose the best option for my electric bike motor based on factors like capacity and cost. The cost effectiveness of different battery types can greatly impact the overall performance of my electric bike.
Here are some key considerations:
-
Li-ion batteries offer higher capacities, providing longer riding distances, but they come at a higher cost.
-
Lead-acid batteries offer good value for money, but their charging protocols may be less efficient.
-
NiMH batteries strike a balance between capacity and cost, making them a popular choice.
-
LiFePO4 batteries have a longer lifespan and are more stable, but they are also more expensive.
-
Regular maintenance is crucial for optimizing the performance and lifespan of any battery type.
The Importance of Regular Battery Maintenance
Regular maintenance of my electric bike battery is essential for ensuring optimal performance and longevity. Neglecting battery maintenance can lead to decreased power output, reduced range, and ultimately, a shorter lifespan for the battery. By following proper care and charging techniques, I can extend the lifespan of my electric bike battery and maximize its performance.
Here are some tips for maintaining and caring for my electric bike battery:
| Regular Maintenance Tips | Proper Charging Techniques | Care Tips |
|---|---|---|
| – Clean the battery regularly to remove dirt and debris. | – Avoid overcharging the battery to prevent damage. | – Store the battery in a cool, dry place to prevent overheating. |
| – Inspect the battery for any signs of damage or wear. | – Use a charger specifically designed for my electric bike battery. | – Avoid extreme temperatures, as they can affect battery performance. |
| – Keep the battery terminals clean and free from corrosion. | – Charge the battery at room temperature for optimal results. | – Avoid deep discharges, as they can shorten the battery’s lifespan. |
Regulating Motor Speed With DC Brushless Controllers
When it comes to controlling the speed of my electric bike motor, I rely on DC brushless controllers. These controllers offer precise regulation of motor speed, ensuring a smooth and efficient ride.
With the ability to adjust the throttle control, I can easily increase or decrease the motor speed according to my desired level of assistance. This allows for optimal power output, whether I’m climbing steep hills or cruising on flat terrain.
Additionally, DC brushless controllers offer the benefit of regenerative braking. This means that when I apply the brakes, the motor acts as a generator, converting kinetic energy into electrical energy and recharging the battery. This not only improves the overall efficiency of the system but also increases the range of my electric bike.
Overall, using DC brushless controllers provides me with enhanced control, energy efficiency, and a more enjoyable riding experience.
Customizing Power Output With Torque Sensor Systems
My favorite feature of torque sensor systems is the ability to adjust my power output based on the road conditions. This customization allows me to have full control over my electric bike’s performance, ensuring a smooth and efficient ride. With torque sensor systems, I can easily adjust the power levels to match the terrain I am riding on. For example, when climbing a steep hill, I can increase the power output to get the extra assistance I need. On the other hand, when riding on a flat road, I can decrease the power output to conserve battery life. This flexibility in adjusting power levels enhances my overall biking experience and allows me to tailor the performance of my electric bike to my specific needs.
| Customizing Power Output | Adjusting Power Levels | Road Conditions |
|---|---|---|
| Increase power for hills | Decrease power for flat | Uphill |
| Decrease power for flats | Increase power for hills | Downhill |
| Optimize battery life | Maximize speed | Uneven terrain |
| Improve efficiency | Enhance acceleration | Smooth pavement |
Frequently Asked Questions
How Much Does It Cost to Repair and Maintain an Electric Bike Motor Compared to a Traditional Bike?
Repairing and maintaining an electric bike motor can be more expensive compared to a traditional bike. Due to the specialized parts and services required, repair costs for electric bike motors can be higher.
Additionally, the complexity of electric bike motors may result in more frequent maintenance, which can also contribute to higher maintenance costs.
However, it is important to note that electric bike motors still offer cost savings in terms of lower maintenance costs and fewer repairs compared to traditional bikes overall.
What Is the Environmental Impact of Emissions Produced by Electric Bike Motors?
The environmental impact of emissions produced by electric bike motors is significantly lower compared to combustible engines. Electric bike motors offer emission reduction and contribute to a more sustainable mode of transportation.
They help in reducing air pollution and greenhouse gas emissions, leading to cleaner and healthier environments. This makes electric bikes a great choice for eco-conscious individuals looking for an environmentally friendly commute option.
How Frequently Should Electric Bike Motors Be Maintained Due to Their Complexity?
Maintaining electric bike motors is essential for optimal performance due to their complexity. Regular maintenance helps prevent issues and ensures longevity. The frequency of maintenance depends on factors like usage, terrain, and weather conditions.
Generally, it is recommended to inspect and clean the motor, check the battery connections, and lubricate moving parts every few months. Regular maintenance not only enhances the motor’s efficiency but also extends its lifespan, resulting in a smoother and more enjoyable eco-friendly commute.
Can You Customize the Acceleration Levels of Electric Bike Motors for Energy Efficiency?
Yes, you can customize the acceleration levels of electric bike motors for energy efficiency.
By using programmable controllers, you have the ability to adjust the power output according to your preferences and road conditions.
This not only allows for a more personalized riding experience but also helps optimize the battery life.
What Are the Specialized Parts and Services Required for Repairing and Maintaining Electric Bike Motors?
When it comes to repairing and maintaining electric bike motors, there are a few specialized parts and services that may be required.
Some common maintenance issues include checking and replacing worn-out components like brake pads and tires, as well as ensuring proper alignment of the motor and drivetrain.
Specialized tools, such as torque wrenches and spoke wrenches, may also be needed for certain repairs.
It’s important to consult with a professional or refer to the manufacturer’s guidelines for specific maintenance needs.
Conclusion
In conclusion, electric bike motors offer a range of benefits for eco-friendly commuting. The mechanics behind these motors, from the types of motors to the components and batteries used, all contribute to their optimal performance.
By choosing the right controller and understanding the advantages of electric bike motors, cyclists can enjoy increased speed capabilities and cost savings. However, regular maintenance, including battery upkeep, is essential for long-term functionality.
So, hop on your electric bike and embrace the power and efficiency of this innovative mode of transportation. Ride on!

I am Hans, an author of ManagEnergy.tv. I love to write and share my thoughts on energy management with the world. I am always here to help others learn about energy management and how to save money. I enjoy spending time with my family and friends when I’m not writing or working.

You might be wondering why someone would bother converting a regular bike into an electric one. Let me assure you, the benefits make it entirely worthwhile.
Electric bike conversion kits offer a cost-effective solution for those of us who want the benefits of an e-bike without breaking the bank. With a battery pack, controller unit, and motor, these kits can transform any bike into a motorized marvel.
But selecting the right kit is crucial, considering factors like power, speed, and battery capacity. Trust me, once you experience the thrill of biking with motorized assistance, you’ll never look back.
Key Takeaways
- Electric bike conversion kits offer a more affordable solution for going green and reducing carbon footprint.
- Understanding power requirements and cycling style is crucial in selecting the right electric bike conversion kit.
- The size and power of the motor, as well as the battery capacity, are important factors to consider when choosing the components of an electric bike conversion kit.
- Proper installation and maintenance, following the provided instructions and seeking assistance if needed, are essential for ensuring the safety and optimal performance of the electric bike conversion kit.
The Benefits of Electric Bike Conversion Kits
I really appreciate the benefits that electric bike conversion kits offer. They reduce my carbon footprint and allow me to enjoy the thrill of biking with motorized assistance.
The advantages of electric bike conversion kits are numerous. First, they provide a cost-effective solution for converting my existing bicycle into an electric one. This saves me money compared to buying a new e-bike.
Second, these kits allow me to enjoy the benefits of an e-bike without the high cost. Additionally, electric bike conversion kits offer flexibility. They can be used for various types of bikes, from beach cruisers to mountain bikes.
Furthermore, they provide the option to choose the right motor size and power based on individual needs and preferences.
Overall, the benefits and advantages of electric bike conversion kits make them an excellent choice for enhancing my biking experience.
A Cost-Effective Solution for Green Transportation
Converting a regular bicycle into an electric one with a conversion kit offers an affordable and eco-friendly transportation solution. With the rising concern for environmental sustainability, converting bicycles into electric ones has gained popularity.
It allows individuals to enjoy the benefits of motorized assistance without the need to purchase a new e-bike. Electric bike conversion kits consist of a battery pack, controller unit, and motor, which can be easily installed on any existing bicycle.
Choosing the right conversion kit is crucial, considering factors such as motor size, power requirements, and battery capacity. By converting bicycles into electric ones, we can reduce our carbon footprint and contribute to a greener environment.
It’s a cost-effective solution for green transportation, enabling us to enjoy the thrill of biking while being conscious of our impact on the planet.
How Electric Bike Conversion Kits Work
Installing an electric bike conversion kit involves connecting the battery pack, controller unit, and motor to create a motorized bicycle.
Advantages:
- Affordable: Converting a regular bicycle using a conversion kit is a cost-effective solution compared to buying a new e-bike.
- Customizable: Electric bike conversion kits can be used on various types of bikes, allowing you to transform your favorite bicycle into an electric one.
- Environmentally friendly: By converting your bike, you can reduce your carbon footprint and contribute to a greener environment.
Disadvantages:
- DIY Skills Required: Installing a conversion kit requires technical knowledge and proper tools. Seek assistance if needed.
- Bike Compatibility: Not all bikes are suitable for conversion. Research and choose a kit that suits your bike’s requirements.
- Maintenance: Regular maintenance is necessary to ensure optimal performance and safety.
Overall, electric bike conversion kits provide an affordable and customizable way to enjoy the benefits of an e-bike while contributing to a greener environment. However, proper installation and maintenance are crucial for a successful conversion.
Choosing the Right Conversion Kit for Your Bike
When selecting the right conversion kit for my bicycle, it’s important to consider factors such as motor size and battery capacity. These two elements play a crucial role in determining the performance and efficiency of an electric bike. To make an informed decision, I have created a table below that outlines the cost-efficient options and factors to consider when choosing a conversion kit.
| Conversion Kit Features | Cost-Efficient Options | Factors to Consider |
|---|---|---|
| Motor Size | 250W | Weight capacity, terrain preferences |
| 500W | Desired speed, battery life | |
| 1000W | User reviews | |
| 2000W+ | ||
| Battery Capacity | 36V | Usage frequency, environmental conditions |
| 48V | ||
| 52V |
Converting Different Types of Bikes With Ease
I can easily convert various types of bicycles into electric ones using the right kit and proper techniques. Converting folding bikes is a popular choice for commuters looking to enhance their riding experience.
The benefits of e-bike conversion kits for commuting are numerous:
- Increased speed: With the assistance of an electric motor, commuting becomes faster and more efficient.
- Extended range: Electric bike conversion kits allow for longer distances to be covered without exhaustion.
- Easy storage: Folding bikes are convenient for urban dwellers, and converting them into electric ones adds an extra layer of convenience.
Understanding Power Requirements for Optimal Performance
To achieve optimal performance, it is crucial to understand the power requirements of an electric bike conversion. By selecting the right motor and battery, you can optimize the performance of your converted bike. Here are some common power requirements to consider when choosing a conversion kit:
| Power Requirement | Bike Type | Terrain |
|---|---|---|
| 250W-500W | City Bike | Flat |
| 500W-750W | Mountain | Hilly |
| 750W-1000W | Cargo | Off-road |
Exploring the Components of a Conversion Kit
Now that we have a good understanding of the power requirements for optimal performance in an electric bike conversion kit, let’s explore the components of a conversion kit in more detail. This will help us in selecting the right motor power options and understanding battery compatibility.
-
Motor Power Options:
-
The size and power of the motor are important factors to consider when choosing the right one for your bike.
-
Bigger motors provide more speed, while smaller motors offer a more gentle ride.
-
Motor size varies from 250W up to 2000W and beyond, allowing for a range of options based on individual needs.
-
Battery Compatibility:
-
Battery lifespan and capacity are crucial factors to consider when selecting a battery.
-
Higher battery capacity allows for longer rides or faster speeds.
-
It is important to check the compatibility of the battery with the chosen conversion kit to ensure optimal performance and safety.
Selecting the Ideal Motor Size for Your Needs
When selecting the ideal motor size for my needs, I consider factors such as desired speed and battery life. Choosing the right motor size is crucial in maximizing performance and battery life.
A bigger motor offers more speed, while a smaller motor provides a more gentle ride. Motor sizes range from 250W up to 2000W and beyond. It’s important to choose a motor that matches my individual needs.
If I want to go faster, a larger motor would be suitable. However, if I prioritize battery life, a smaller motor would be more efficient.
Reviews from experienced users can also provide valuable insights into motor selection.
Battery Selection and Capacity Considerations
I carefully consider factors such as battery lifespan and capacity when selecting the right battery for my electric bike conversion kit.
The battery lifespan depends on usage frequency and environmental conditions, so it’s important to choose a battery that can withstand the demands of regular use and varying weather conditions.
Additionally, the battery capacity is crucial for determining the range of my electric bike and how long it can sustain higher speeds. I prioritize a higher battery capacity to ensure longer rides and reduce the need for frequent recharging.
Extending the Lifespan of Your Electric Bike Battery
To extend the lifespan of my electric bike battery, proper maintenance and regular charging are essential. Maximizing battery efficiency and prolonging battery lifespan require attention to detail.
Firstly, it is important to charge the battery regularly, even if it is not in use. This helps to maintain its capacity and prevent degradation.
Secondly, avoid overcharging the battery, as this can lead to decreased performance and a shorter lifespan.
Additionally, storing the battery in a cool and dry place when not in use can help to preserve its overall health.
Lastly, it is crucial to avoid extreme temperatures, both hot and cold, as they can negatively impact the battery’s performance.
Ensuring Safety and Performance With Proper Installation
Installing the motor and battery correctly is crucial for ensuring maximum safety and optimal performance. When it comes to electric bike conversion kits, there are common installation mistakes that can be easily avoided.
Here are three important things to keep in mind:
- Make sure to securely fasten the motor to the bike frame to prevent any movement or vibrations during use.
- Double-check all electrical connections to ensure they are properly connected and insulated to avoid any short circuits or malfunctions.
- Pay attention to the battery installation, ensuring it is securely attached and properly balanced on the bike frame.
Troubleshooting common issues that may arise during installation is also essential. Some common issues include loose connections, battery not charging properly, or the motor not engaging. By carefully following the installation instructions and troubleshooting any potential problems, you can ensure a safe and smooth riding experience with your electric bike conversion kit.
Step-by-Step Guide to Installing an Electric Bike Conversion Kit
Securing the motor and battery properly ensures a safe and efficient installation process. When installing an electric bike conversion kit, it is important to follow the step-by-step guide to ensure a successful transformation. Here are some installing techniques and troubleshooting tips to help you along the way:
- Start by gathering all the necessary tools and components for the installation.
- Carefully read and understand the instruction manual provided with the conversion kit.
- Begin by attaching the motor to the bike frame securely, following the manufacturer’s guidelines.
- Connect the controller unit to the motor and ensure all the wires are properly connected.
- Install the battery pack onto the bike frame, making sure it is firmly secured.
Table:
| Installing Techniques | Troubleshooting Tips |
|---|---|
| Double-check all connections | Check for loose or damaged wires |
| Secure all bolts and screws tightly | Ensure the battery is fully charged |
| Test the system before riding | Pay attention to any unusual noises or vibrations |
| Seek professional assistance if needed | Consult the manufacturer’s customer support for troubleshooting |
Maintenance Tips for Long-lasting Electric Bike Conversion Kits
Now that we’ve covered the step-by-step installation process of an electric bike conversion kit, let’s turn our attention to an equally important aspect: maintenance.
Proper battery maintenance is essential for ensuring the longevity and performance of your electric bike conversion kit. Here are some troubleshooting tips to keep in mind:
- Regularly check the battery voltage to ensure it is within the recommended range.
- Keep the battery clean and free from dirt and moisture.
- Store the battery in a cool and dry place to prevent overheating.
- If you notice a decrease in battery performance, consider recharging or replacing it.
- In case of any issues, consult the manufacturer’s manual or seek professional assistance.
Taking Your Ride to the Next Level With Electric Bike Conversion Kits
Upgrading my bicycle with an electric bike conversion kit has truly enhanced my riding experience.
The advantages of electric bike conversion kits are numerous, enhancing your cycling experience in multiple ways.
Firstly, these kits allow you to go green and save money simultaneously. By converting your regular bicycle into an electric one, you reduce your carbon footprint and contribute to a more sustainable environment. Additionally, the financial benefits are significant, as converting a bike is more affordable compared to buying a new e-bike.
Furthermore, electric bike conversion kits provide motorized assistance, making your rides more enjoyable and effortless. Whether you’re tackling steep terrains or commuting long distances, the motorized assistance ensures a smoother, more comfortable ride.
Overall, electric bike conversion kits offer a cost-effective way to transform your ride while promoting environmental sustainability.
Frequently Asked Questions
Are There Any Specific Tools Required for Installing an Electric Bike Conversion Kit?
Yes, there are specific tools required for installing an electric bike conversion kit. Some common tools include wrenches, screwdrivers, pliers, and Allen keys.
It is important to choose the right battery for your electric bike conversion kit as it can affect the performance and range of your e-bike.
To install the kit on different types of bicycles, follow a step-by-step guide provided by the manufacturer, ensuring proper alignment and secure attachment of all components.
How Can I Test the System of the Conversion Kit Before Using It?
To test the system of an electric bike conversion kit before using it, there are a few key steps to follow.
First, make sure all connections are secure and properly tightened.
Then, use a voltage meter or multimeter to check the voltage output of the battery and ensure it matches the stated specifications.
Next, test the motor by engaging it and observing its performance.
Is It Possible to Convert a Folding Bike or a Road Bike Into an Electric Bike?
Yes, it is possible to convert a folding bike or a road bike into an electric bike using electric bike conversion kits.
The advantages of electric bike conversion kits are that they provide an affordable way to transform your existing bike into an electric one.
There are various electric bike conversion kits available on the market, and it’s important to choose the best one for your specific needs and preferences.
Researching and reading reviews can help you find the top electric bike conversion kits that suit your requirements.
What Are Some Common Maintenance Tasks for Electric Bike Conversion Kits?
When it comes to maintaining electric bike conversion kits, there are a few key tips to keep in mind.
First, regularly check the motor and battery connections to ensure they are secure.
Second, clean the components regularly to prevent dirt and debris from affecting performance.
Third, troubleshoot common issues like battery charging problems or motor malfunctions by referring to the kit’s manual.
Following these maintenance tips will help keep your electric bike conversion kit running smoothly and efficiently.
Are There Any Additional Accessories or Upgrades That Can Enhance the Performance of an Electric Bike Conversion Kit?
Upgrading the battery capacity and optimizing the motor power are two ways to enhance the performance of an electric bike conversion kit. Increasing the battery capacity allows for longer rides or faster speeds, while a more powerful motor provides greater speed and acceleration.
Additionally, improving the braking system can enhance safety and control, and upgrading the suspension system can provide a smoother and more comfortable ride. Integrating smart technology features, such as GPS or smartphone connectivity, can also enhance the overall experience.
Conclusion
In conclusion, electric bike conversion kits offer a cost-effective and environmentally friendly solution for transforming a regular bicycle into a powerful and efficient electric bike. With the right conversion kit, cyclists can enjoy the benefits of motorized assistance without the high cost of purchasing a new e-bike.
By selecting the appropriate motor and battery, and following proper installation and maintenance procedures, riders can enhance their cycling experience and take their ride to the next level.
So why wait? Unleash the power of electric bike conversion kits and revolutionize your ride today.
I am Charlotte, an author of ManagEnergy.tv and I love everything about energy management! I have always been passionate about helping people and businesses save energy and money, so this is the perfect career for me!

As someone who loves cycling, I’m constantly on the lookout for methods to improve my biking adventures. This is why finding out about the capabilities of hybrid electric bikes was so exciting for me.
These innovative machines combine an electric motor with pedaling power, providing an extra boost while still being easy to ride. It’s like having a personal assistant that effortlessly propels you forward.
But the benefits don’t stop there. Hybrid electric bikes also offer cost savings, environmental advantages, and a wide range of features to maximize performance and comfort.
In this article, I will delve into the world of hybrid electric bikes, unlocking their potential and uncovering their many benefits.
Key Takeaways
- Hybrid electric bikes offer convenience and power, making them a popular choice among commuters and recreational cyclists.
- Choosing a hybrid electric bike promotes environmental responsibility and contributes to a greener environment.
- Understanding the types and features of hybrid electric bikes, such as pedal-assist and throttle twist models, is important for selecting the right bike.
- When buying and maintaining a hybrid electric bike, factors such as price, battery life, maintenance, and safety should be considered.
The Convenience of Hybrid Electric Bikes
I love how hybrid electric bikes offer convenience and power, making them a perfect choice for quick trips or leisurely rides around town.
The versatility of these bikes for different terrains and road conditions is truly impressive. Whether you’re riding on roads, gravel paths, or dirt trails, hybrid electric bikes can handle it all.
What sets them apart is the role of smart technologies in optimizing power usage. These technologies help ensure that the electric motor is used efficiently, providing the perfect amount of assistance when needed.
This not only enhances the riding experience but also extends the battery life, allowing you to cover greater distances on a single charge.
With their convenience and smart features, hybrid electric bikes truly offer a superior riding experience.
Cost Savings With Hybrid Electric Bikes
Investing in a hybrid electric bike can save you both time and money. Here are some maintenance tips and charging options to consider:
-
Regular maintenance: Keep your hybrid electric bike in top shape by following maintenance guidelines. This includes monitoring battery life and the charging process, as well as cleaning cables and levers to prevent rust build-up. Regular maintenance ensures a safe and enjoyable ride.
-
Optimize charging options: Advancements in technology have made charging more efficient and convenient. With removable batteries, recharging is easier than ever. Consider investing in an anti-theft device for bike security.
-
Cost savings: Hybrid electric bikes are not only eco-friendly but also cost-effective. They require less fuel consumption and have lower maintenance costs compared to traditional bikes. By choosing a hybrid electric bike, you can save on fuel expenses and reduce the frequency of maintenance.
Environmental Benefits of Hybrid Electric Bikes
Riding a hybrid electric bike reduces carbon emissions and contributes to a greener environment. When it comes to long-term sustainability, hybrid electric bikes play a crucial role in building a greener future.
By replacing traditional vehicles with these eco-friendly bikes, we can significantly reduce our carbon footprint and combat climate change.
Moreover, hybrid electric bikes offer health benefits by promoting personal fitness and well-being. Regular cycling can improve cardiovascular health, strengthen muscles, and increase overall stamina. It is a low-impact exercise that is gentle on joints and can be enjoyed by people of all ages and fitness levels.
With these dual advantages of environmental sustainability and personal health, hybrid electric bikes are an excellent choice for those looking to make a positive impact on both themselves and the planet.
Exploring Types and Features of Hybrid Electric Bikes
Exploring the various types and features of hybrid electric bikes, I found that pedal-assist models provide an extra boost when needed. This technology advancement allows riders to seamlessly switch between manual pedaling and electric assistance.
When using a pedal-assist hybrid electric bike, you can experience the following:
-
Effortless acceleration: The electric motor kicks in to provide a smooth and powerful boost, allowing you to effortlessly tackle hills and challenging terrains.
-
Enhanced range: By combining your pedaling power with electric assistance, you can cover greater distances without feeling fatigued.
-
Customizable assistance levels: Most pedal-assist hybrid electric bikes offer multiple assistance modes, allowing you to tailor the level of electric support to your preference and riding conditions.
In comparison, throttle-controlled hybrid electric bikes provide a constant electric boost without the need for pedaling. These bikes are ideal for riders who prefer a more relaxed and effortless riding experience. However, they may require less physical effort but offer limited range compared to pedal-assist models.
Overall, hybrid electric bikes continue to evolve with advancements in technology, providing riders with a wide range of options to suit their riding style and preferences.
Maximizing Performance: Motor and Battery Power
When it comes to maximizing performance, I’ve found that the motor and battery power are key factors to consider.
The motor is responsible for providing the necessary power and assistance to propel the bike forward, while the battery supplies the energy needed to operate the motor.
To optimize motor performance, it is crucial to choose a motor with adequate power output and efficiency. Higher power output allows for faster acceleration and smoother rides, while improved efficiency ensures maximum utilization of the battery’s energy.
Additionally, maximizing battery life is essential for longer rides and extended use. This can be achieved by selecting a bike with a battery that has a larger capacity and implementing energy-saving techniques such as using lower assistance levels when not needed.
Essential Considerations for Buying and Maintaining a Hybrid Electric Bike
Maintaining a hybrid electric bike requires regular upkeep to ensure a safe and enjoyable ride. Here are some maintenance tips to keep your bike in top shape:
-
Choose the right battery: It’s crucial to select the appropriate battery for your hybrid electric bike. Consider factors such as battery life, charging time, and compatibility with your bike model. Opt for a battery with a longer range to avoid running out of charge during your ride. Additionally, look for options that offer quick and efficient charging to minimize downtime.
-
Regular cleaning and inspection: Keep your bike clean by regularly washing it with mild soap and water. Inspect the brakes, cables, and levers for any signs of wear and tear. Clean and lubricate the chain to ensure smooth shifting. Regularly check the tire pressure and adjust it as needed for optimal performance.
-
Follow manufacturer guidelines: It’s important to follow the maintenance guidelines provided by the manufacturer. This includes scheduling regular tune-ups and servicing at authorized service centers. Adhering to these guidelines will help prolong the lifespan of your hybrid electric bike and ensure a safe and enjoyable riding experience.
Safety Tips and Guidelines for Riding a Hybrid Electric Bike
Riding a hybrid electric bike requires following safety guidelines to ensure a secure and enjoyable experience. One important aspect of safety is regular bike maintenance. Keeping your bike in good condition ensures that it functions properly and reduces the risk of accidents. This includes checking the brakes, tires, and gears regularly.
Additionally, when riding at night, it is crucial to prioritize night riding safety. This involves using working headlights and taillights for visibility, wearing bright colors or reflective clothing, and being aware of local laws regarding helmet use. Staying alert and being prepared to take evasive action if necessary is also essential.
Investing in an anti-theft device can provide added security for your bike. By following these safety guidelines and prioritizing bike maintenance, you can have a secure and enjoyable riding experience on your hybrid electric bike.
Enhancing the Riding Experience: Comfort and Control
After discussing safety tips and guidelines for riding a hybrid electric bike, let’s now delve into enhancing the riding experience by focusing on comfort and control.
Comfort and control are paramount when it comes to enjoying your time on a hybrid electric bike. To achieve this, manufacturers have introduced various customization options and incorporated technological advancements. Here are three ways these factors contribute to an improved riding experience:
-
Customizable Features: Hybrid electric bikes offer adjustable power assist levels, allowing riders to tailor their riding experience to their preferences. Additionally, features like cushioned saddles provide comfort during long rides, while advanced control systems optimize performance and rider behavior.
-
Technological Advancements: With technological advancements, hybrid electric bikes now come with features like reliable grip, smooth shifting, and responsive brakes. These advancements enhance the overall control and handling of the bike, making the ride more enjoyable and safer.
-
Upgraded Batteries: Some hybrid electric bikes offer upgraded batteries with longer battery life, increasing the mileage per charge. This ensures that riders can go further without worrying about running out of power.
Additional Information on Hybrid Electric Bikes
When considering a hybrid electric bike, I found it helpful to test ride different models to find the best fit for my needs.
Hybrid electric bikes offer convenience, power, and versatility, making them a popular choice among commuters and recreational cyclists. They are perfect for quick trips or leisurely rides around town, and can tackle various road conditions including challenging terrains.
To ensure optimal performance and longevity, regular maintenance is essential. This includes monitoring battery life and charging process, as well as brake maintenance and regular cleaning of cables and levers.
When riding in challenging terrains, it is important to be prepared and stay alert. Investing in an anti-theft device for bike security is also recommended.
Popular Brands and Accessories for Hybrid Electric Bikes
Now that we have explored additional information about hybrid electric bikes, let’s delve into the world of popular brands and accessories.
As an avid cyclist, I have researched and compared various options to provide you with valuable insights. Here are three popular brands and the accessories they offer:
-
Trek:
- Battery range extenders for longer rides.
- Pannier bags and racks for convenient storage.
- Integrated lighting systems for enhanced visibility.
-
Giant:
- Adjustable power assist levels for on-the-go adjustments.
- Upgraded batteries with longer life for increased mileage per charge.
- Solar panels for eco-friendly recharging.
-
Specialized:
- Power output accessories to enhance torque and engine performance.
- Custom colors and designs for personalized style.
- Compatibility with bike models for safety.
Tips for Choosing the Perfect Hybrid Electric Bike for You
As an avid cyclist, I have researched and compared various options, and I can offer valuable insights on how to choose the perfect hybrid electric bike for you.
When selecting a hybrid electric bike, there are three key factors to consider: choosing the right size, battery range, and power.
First, ensure that the bike is the appropriate size for your height and body type to ensure comfort and proper handling.
Second, battery range is crucial as it determines how far you can go on a single charge. Consider your typical riding distance and choose a bike with a battery range that suits your needs.
Lastly, the power of the motor is essential for performance and efficiency. Look for a motor with sufficient power to provide an enjoyable ride.
Frequently Asked Questions
Are Hybrid Electric Bikes Suitable for All Types of Road Conditions?
Hybrid electric bikes are suitable for various road conditions, including off-road terrain. Their versatility allows them to handle different surfaces like gravel paths and dirt trails.
However, it’s important to note that road conditions can impact the battery life of hybrid electric bikes. Rougher terrains and uphill climbs require more power, which can decrease the battery’s range.
It’s essential to consider the terrain and plan accordingly to ensure a satisfactory ride and avoid running out of battery power.
How Long Does It Take to Recharge the Battery of a Hybrid Electric Bike?
Recharging the battery of a hybrid electric bike can vary depending on the specific model and charging method. On average, it takes around 3-6 hours to fully recharge the battery.
However, it’s important to note that the recharge time can be influenced by factors such as battery capacity, charger efficiency, and power source.
It’s also worth considering that frequent fast charging may have a negative impact on the battery lifespan. Therefore, it’s recommended to follow the manufacturer’s guidelines for optimal charging practices.
Can I Use a Hybrid Electric Bike for Commuting Long Distances?
Using a hybrid electric bike for daily commuting has both pros and cons.
On the positive side, it offers convenience and an extra boost, making long distances more manageable. The electric motor helps reduce fatigue and allows for faster travel.
However, compared to traditional bikes, hybrid electric bikes may require more maintenance and have a higher upfront cost. Additionally, the battery life and charging time should be considered for longer commutes.
What Are the Different Types of Assistance Levels Available on Hybrid Electric Bikes?
When exploring the battery life of hybrid electric bikes, it’s important to consider the different types of assistance levels available. These levels determine the amount of power the electric motor provides while pedaling.
Most hybrid electric bikes offer three levels of assistance: low, medium, and high. By comparing the performance of different hybrid electric bike models, you can find the one that best suits your needs.
Factors such as motor power, battery range, and charging options should be taken into account to ensure an optimal riding experience.
Are Hybrid Electric Bikes Compatible With Bike Accessories Such as Locks and Carriers?
Hybrid electric bikes are compatible with various bike accessories such as locks and carriers, ensuring both security and convenience. Like a sturdy fortress, these bikes can be equipped with anti-theft devices, allowing you to park them worry-free.
Additionally, many models offer integrated carrying systems and folding capabilities for easy storage and transportation. With these features, hybrid electric bikes provide a secure and efficient solution for both your commuting and storage needs.
Conclusion
In conclusion, hybrid electric bikes are an exceptional option for those seeking convenience, cost savings, and environmental benefits.
Their combination of electric power and pedaling makes for an effortless and enjoyable ride.
With their lightweight frames, folding capabilities, and various accessories, these bikes offer versatility and practicality.
Their motor and battery power maximize performance, ensuring a smooth and efficient ride.
By reducing fuel consumption and air pollution, hybrid electric bikes are a sustainable transportation alternative.
So why wait? Unleash the potential of these pedal-powered powerhouses and embark on a greener, more exhilarating journey.

Hi there! I’m Jane and I love writing about energy management. I started ManagEnergy.tv as a way to share my knowledge with the world and help people save money on their energy bills.

Why Does Solar Power Have A Higher Net-Energy Ratio Than Coal-Fired Electricity

What Roles Do The Oceans And Winds Play In The Absorption Of Solar Energy

Why Is The Solar Energy

Why Solar Energy Is Important

Solar Energy Is Best Absorbed By What Material

California Electric Motorcycle Laws: A Comprehensive Guide to Riding Safely
The Future of Electric Vehicles: Trends and Innovations to Watch
Environmental Innovation Turned Deadly: Ocean Wind Turbines Pose Threat to Whales’ Survival
Revolutionizing Highways: Wind Turbines Take the Road to Renewable Energy

Designing Efficient and Safe Wind Turbine Towers: Key Considerations and Insights

In 2009, About What Percent Of U.S. Energy Consumption Was Supplied By Solar Energy

What Is The Main Disadvantage Of Solar Energy

Solar Photovoltaic Cells Generate Energy By What Procedure

Why Are Scientists Looking For Alternative Energy Sources Such As Solar And Wind Power

Approximately What Percentage Of Solar Energy Is Trapped By Photosynthesizers
-
 Sustainable Supply Chain Management2 months ago
ManagEnergy Acquires GPST2030.org Domain to Strengthen Commitment to Sustainable Transport
-
 Wind Energy3 months ago
How Much Oil Does It Take To Lubricate A Wind Turbine
-
Electric Motorbike3 weeks ago
California Electric Motorcycle Laws: A Comprehensive Guide to Riding Safely
-
Electricity Vehicle3 weeks ago
The Future of Electric Vehicles: Trends and Innovations to Watch
-
Solar2 months ago
In 2009, About What Percent Of U.S. Energy Consumption Was Supplied By Solar Energy
-
 Wind Energy3 weeks ago
Environmental Innovation Turned Deadly: Ocean Wind Turbines Pose Threat to Whales’ Survival
-
 Wind Energy3 weeks ago
Revolutionizing Highways: Wind Turbines Take the Road to Renewable Energy
-
 Solar2 months ago
Why Should We Use Solar Energy Instead Of Fossil Fuels